Turn your ShipStation Purchases into Social Proof
ShipStation is a popular web-based shipping software designed to streamline and automate the order fulfillment process for e-commerce businesses. It integrates with various sales channels, carriers, and marketplaces, allowing businesses to manage shipping, tracking, and returns from a single platform.
You can easily connect ShipStation to Nudgify with our ShipStation integration via Zapier to showcase Social Proof notifications on your website, in real-time.
Connect ShipStation Purchases
The following data from ShipStation will be synced with Nudgify in order to build Nudges:
- Full Name
- Date
- Order ID
- Product Name
- Product ID
- State
Follow the steps below to connect your ShipStation user data to Nudgify and show new purchases in Purchase Nudges.
Step 1. Create a copy of our zap template
We have already created a Zap template which you just need to create a copy in your Zapier account Click on the URL below to use our already created Zap template by clicking on ”Try this template button” as shown in the image.
Create purchase nudges in Nudgify for new ShipStation form submissions (zapier.com)

Step 2. Activate Your Newly Created Zap
In order to be able to use the newly created Zap, you need to connect your Nudgify and ShipStation account to the Zap.
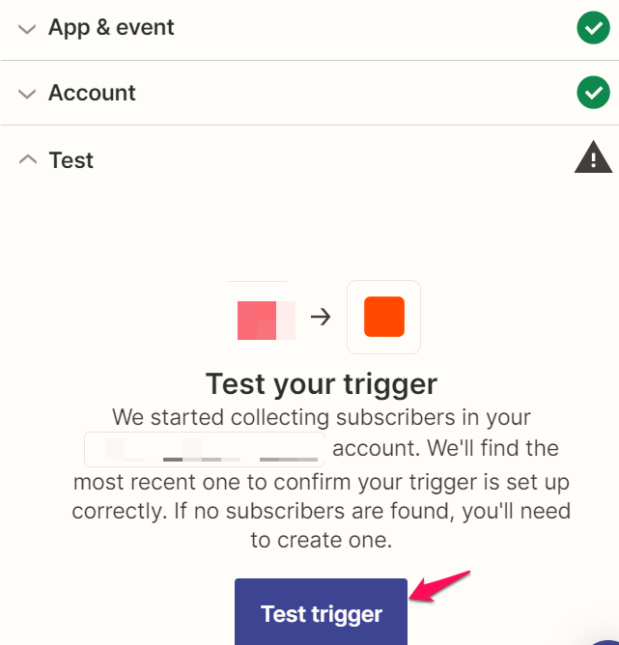
Firstly, click on ”Test trigger Button” to connect your ShipStation Account.
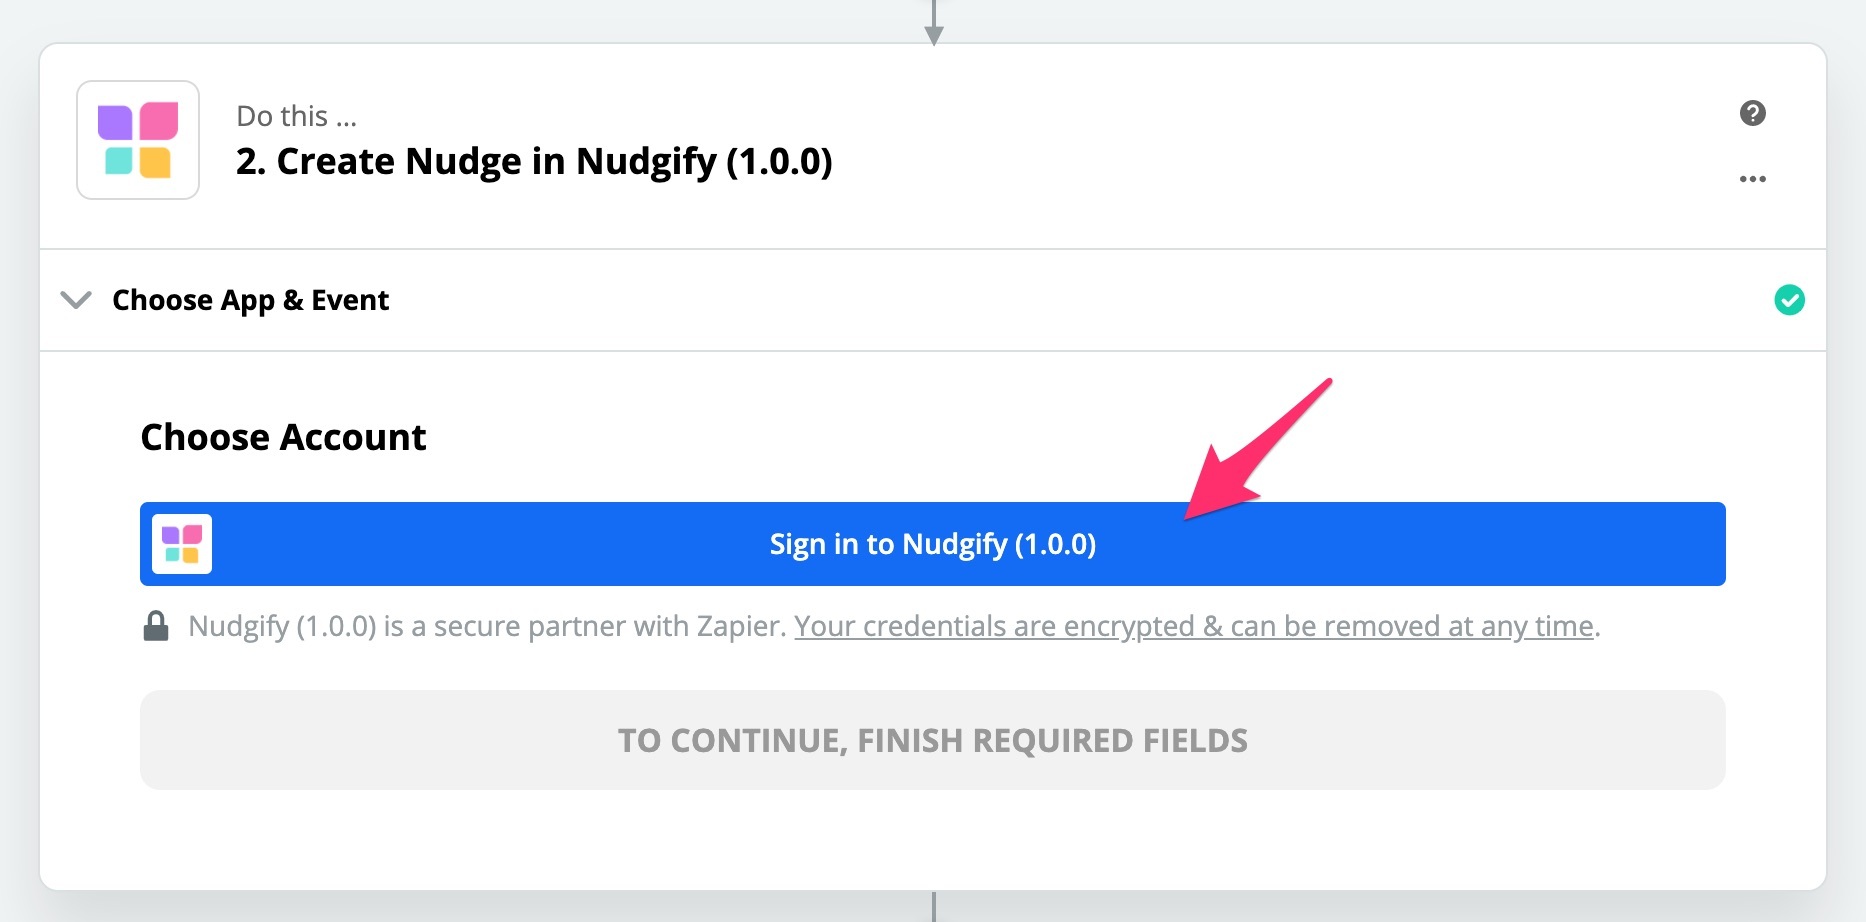
Choose Account: Connect your Nudgify Account
To connect your Nudgify account, click “Sign in to Nudgify”
In Nudgify, copy the API Key and Site Key from your Zapier integration page in your Nudgify account. Go back to Zapier and paste them to connect your Nudgify account.
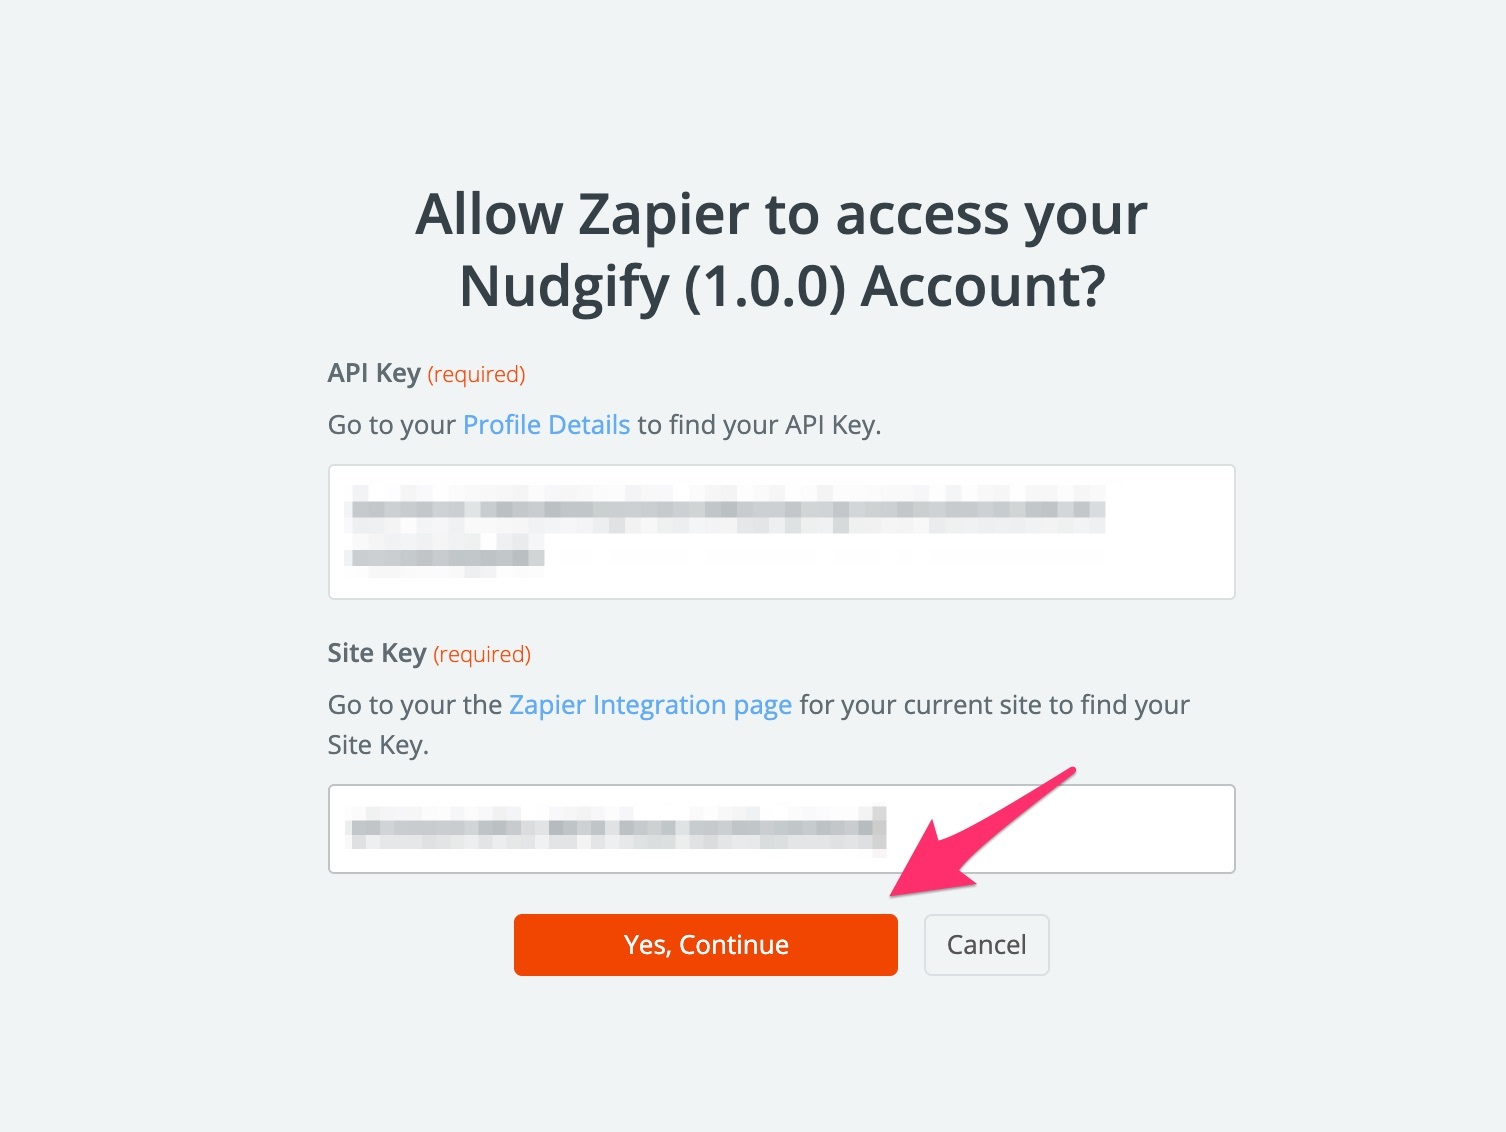
Click “Yes, Continue” to grant Zapier access.
Check if your Zap data is coming through to Nudgify
You can double check whether your Zap data is connected successfully in the Purchase and Sign-up tabs of your Data Feeds. Your Data Feeds is where you can view the data of your integrations that has successfully come through to Nudgify. If your Zap is connected successfully, you should be able to see your test Trigger. All new purchases/sign-ups come through there.
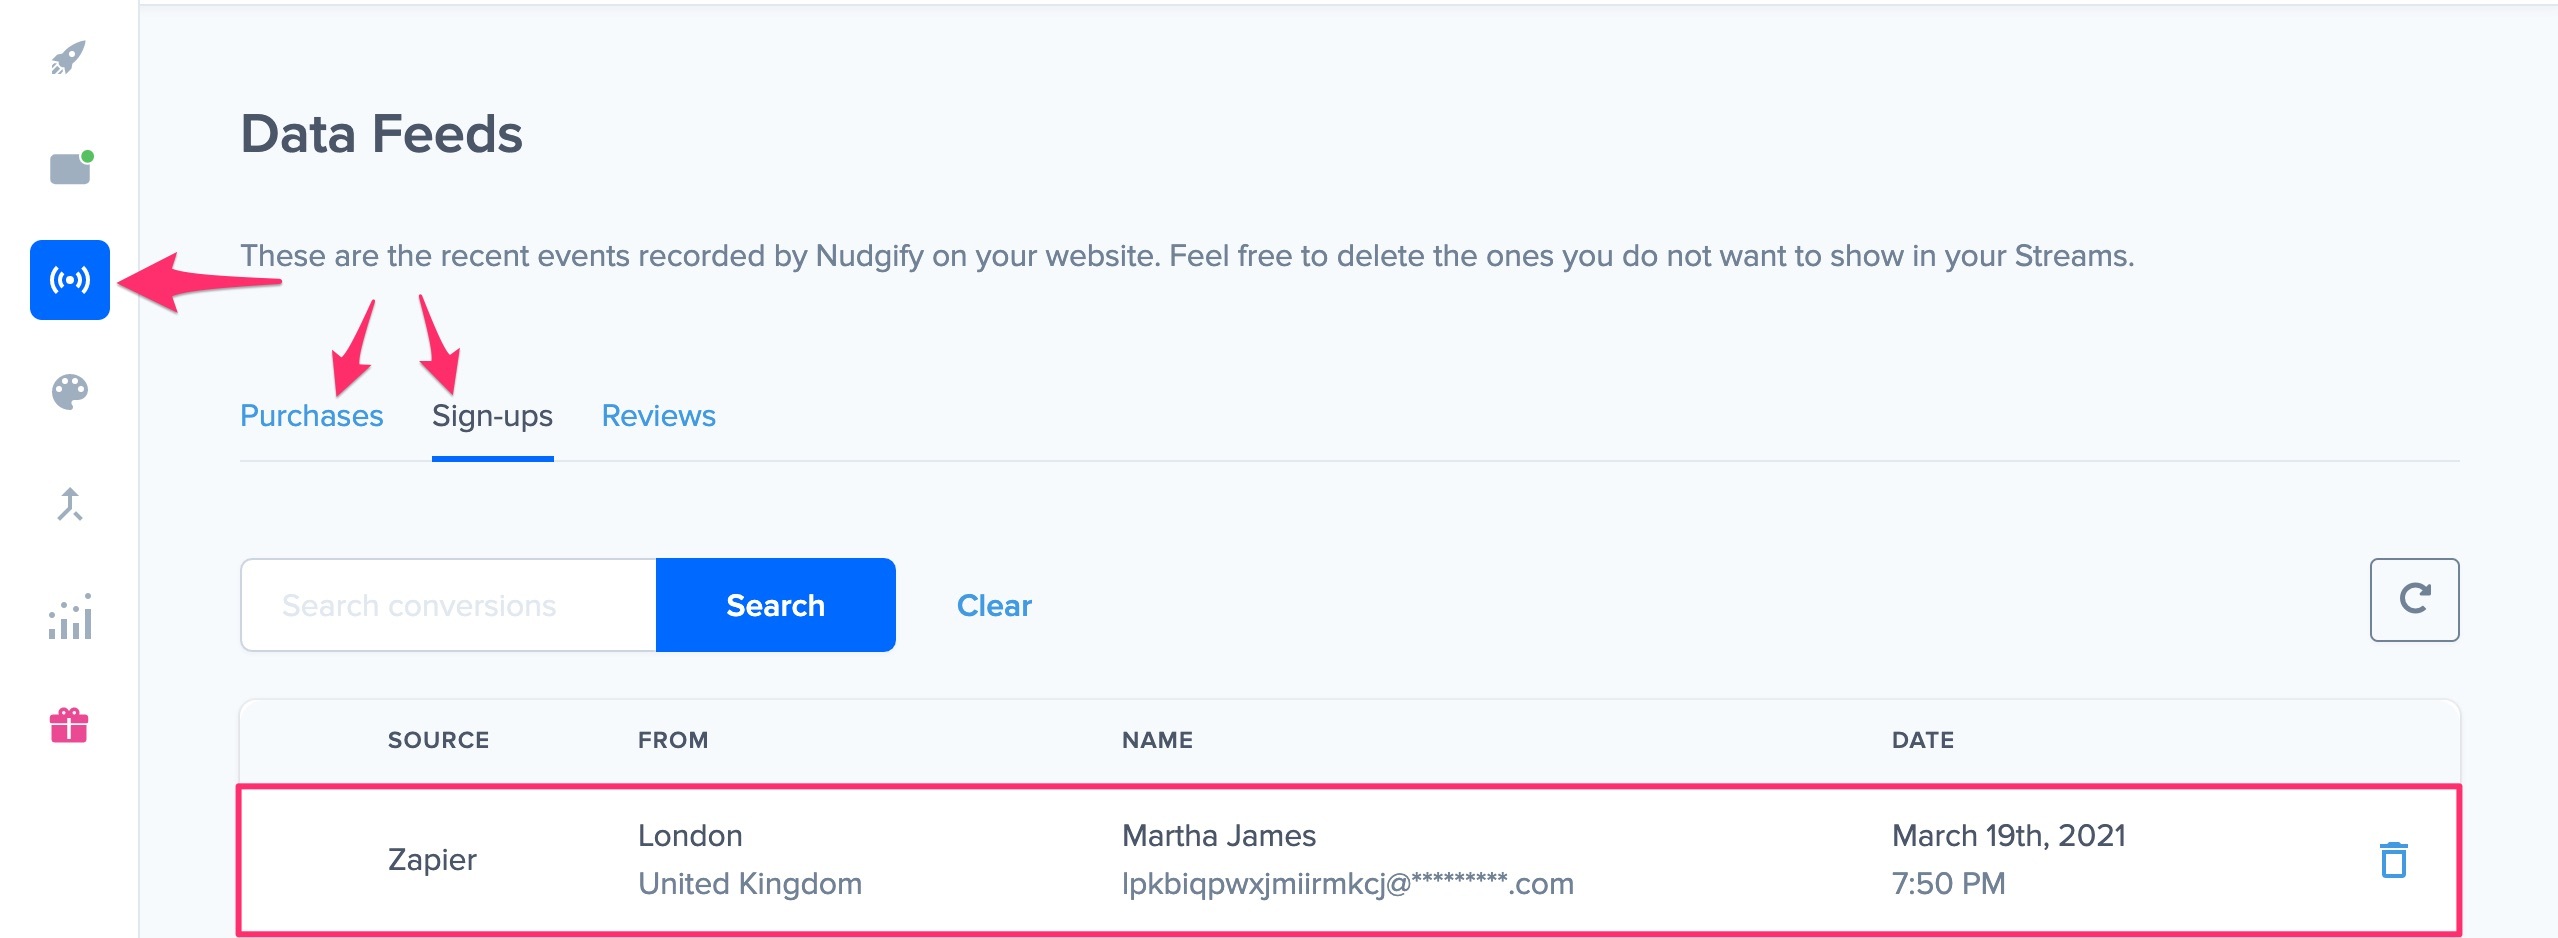
Unfortunately, it is not possible to show purchases or sign-ups that were made before you activated your Zap.
Any new Purchase will be added to your Purchases Data Feed. To turn these data into Social Proof Nudges on your site, create a Purchase Nudge and select Elopage as the data source.
Congratulations! You have now linked your new Elopage Purchases to Nudgify 🙌
Step 3. Create Purchases Nudges for new Elopage Orders
On your Data Feeds page, in the “Purchases” tab, you will be able to see any new purchases that are sent to Nudgify. It’s time to start showcasing new Elopage Purchases in Social Proof Nudges!
You can create two types of Nudges with the Elopage Purchases integration.
- Nudges that show single purchases
- Nudges that show a count of multiple purchases
Show Single Purchases
Go to the Nudges page and click “Add Nudge”. Choose the Purchase Nudge from the Nudge Library.
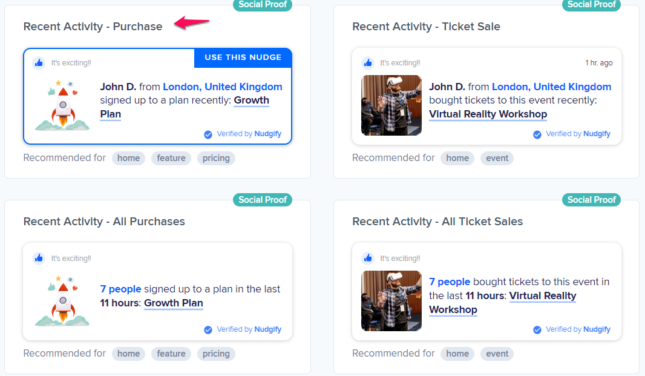
You can now configure the selected Nudge. First of all, select “Elopage Purchases” as the data source. This way, the Nudge will use your Elopage data to show in the Nudge:
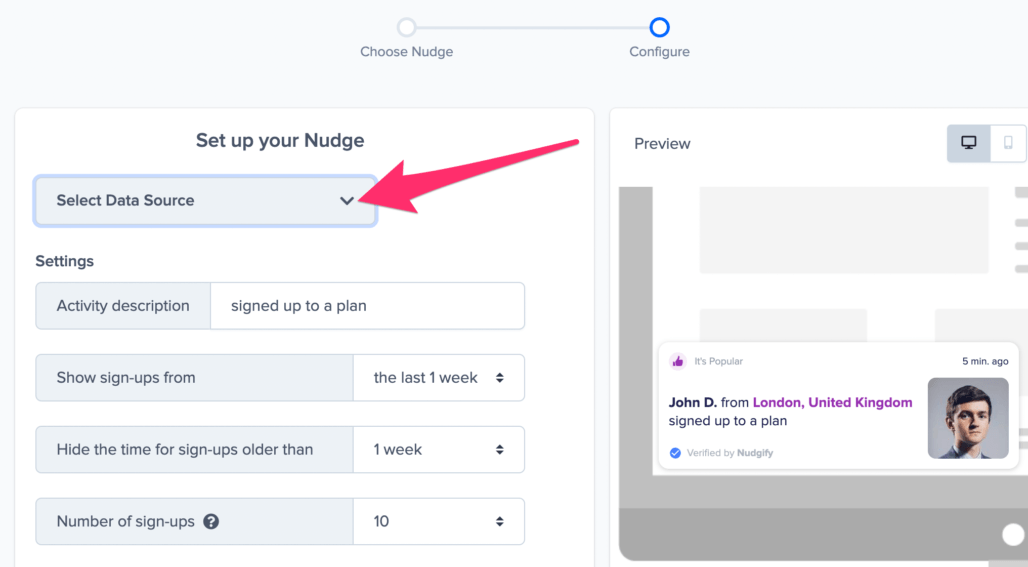
You can also customise the text of the Nudge here (“ordered an item”, “purchased an item”, or whatever you want to display). You can also select how recent the Purchases need to be that you want to display. Find out more about the customisation options for Purchase Nudges.
Once you’re done, click “Continue”. The Nudge will now automatically capture and show individual recent Purchases. You can track how your Nudges perform from your Statistics page.
Show All Purchases
When creating a new Nudge, choose the “Recent Activity – All Purchases” Nudge in your Nudge Library:
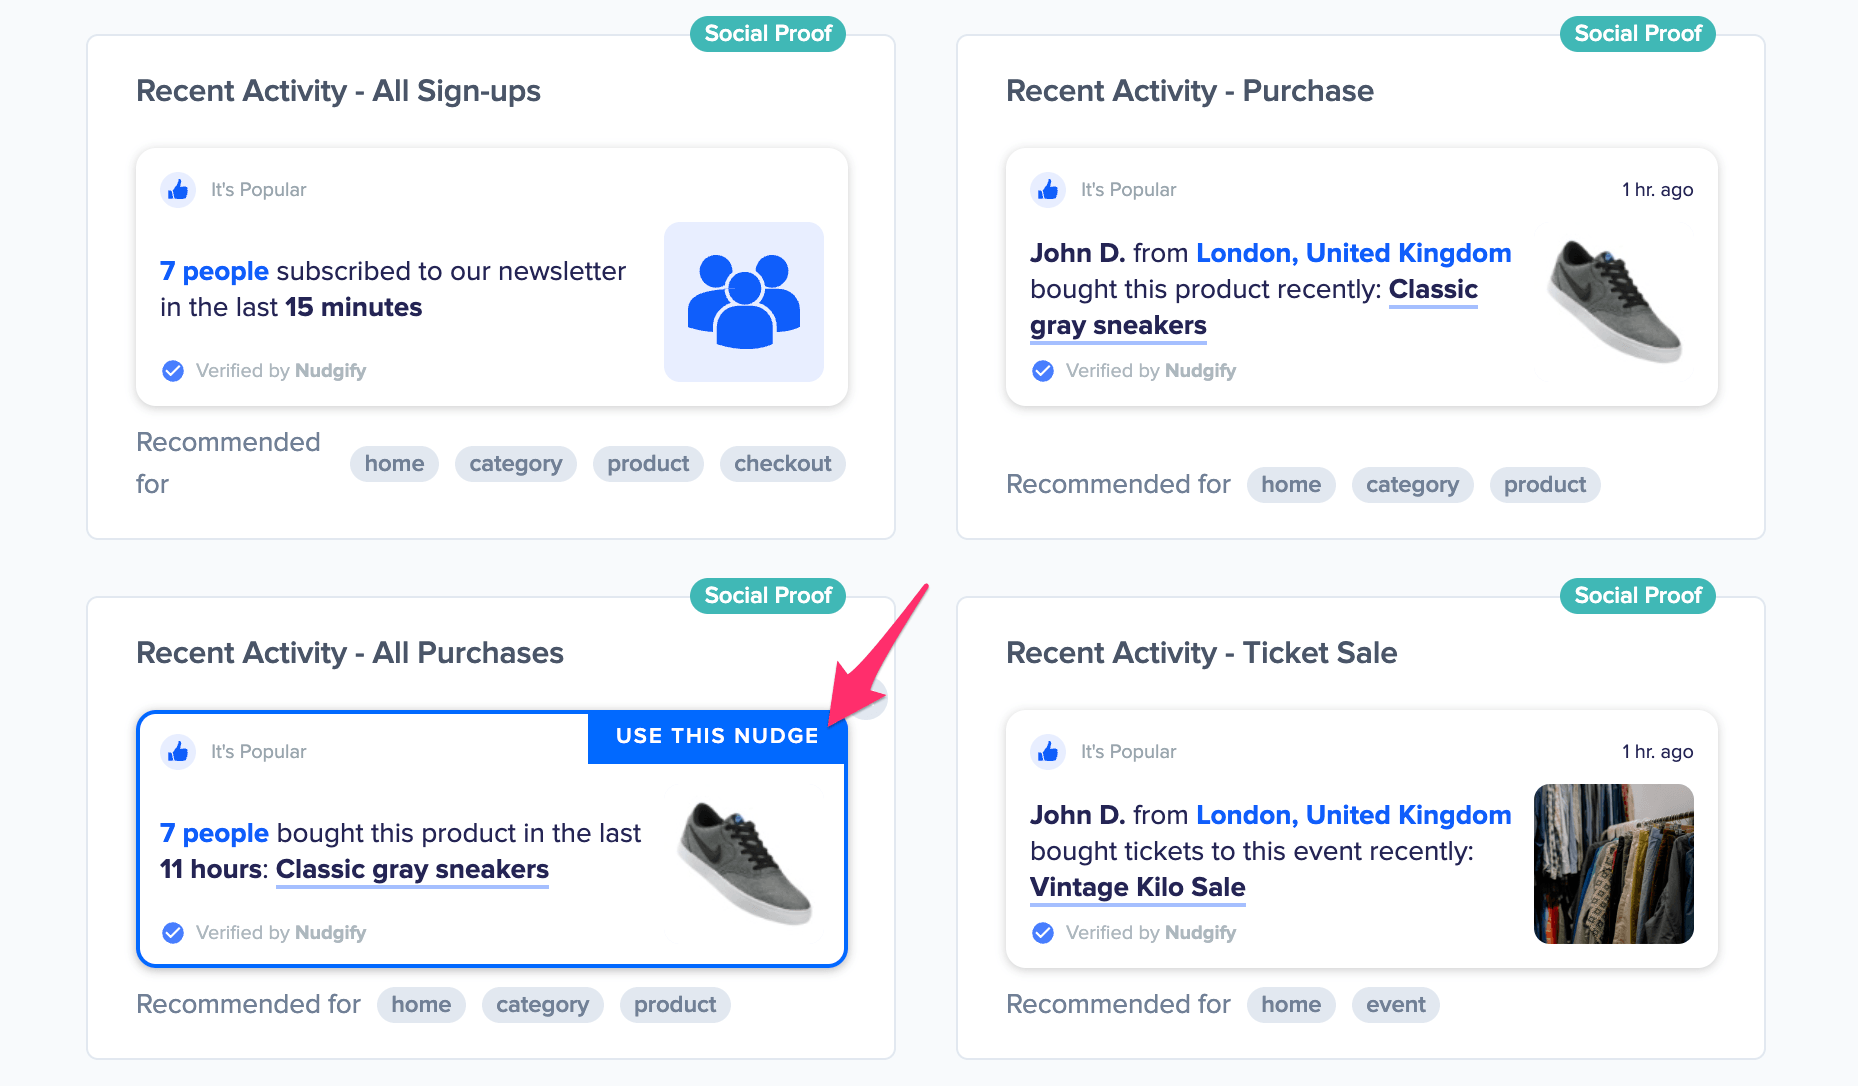
You can now configure the selected Nudge. First of all, select “Elopage Purchases” as the data source. This way, the Nudge will use your Elopage data to show in the Nudge:
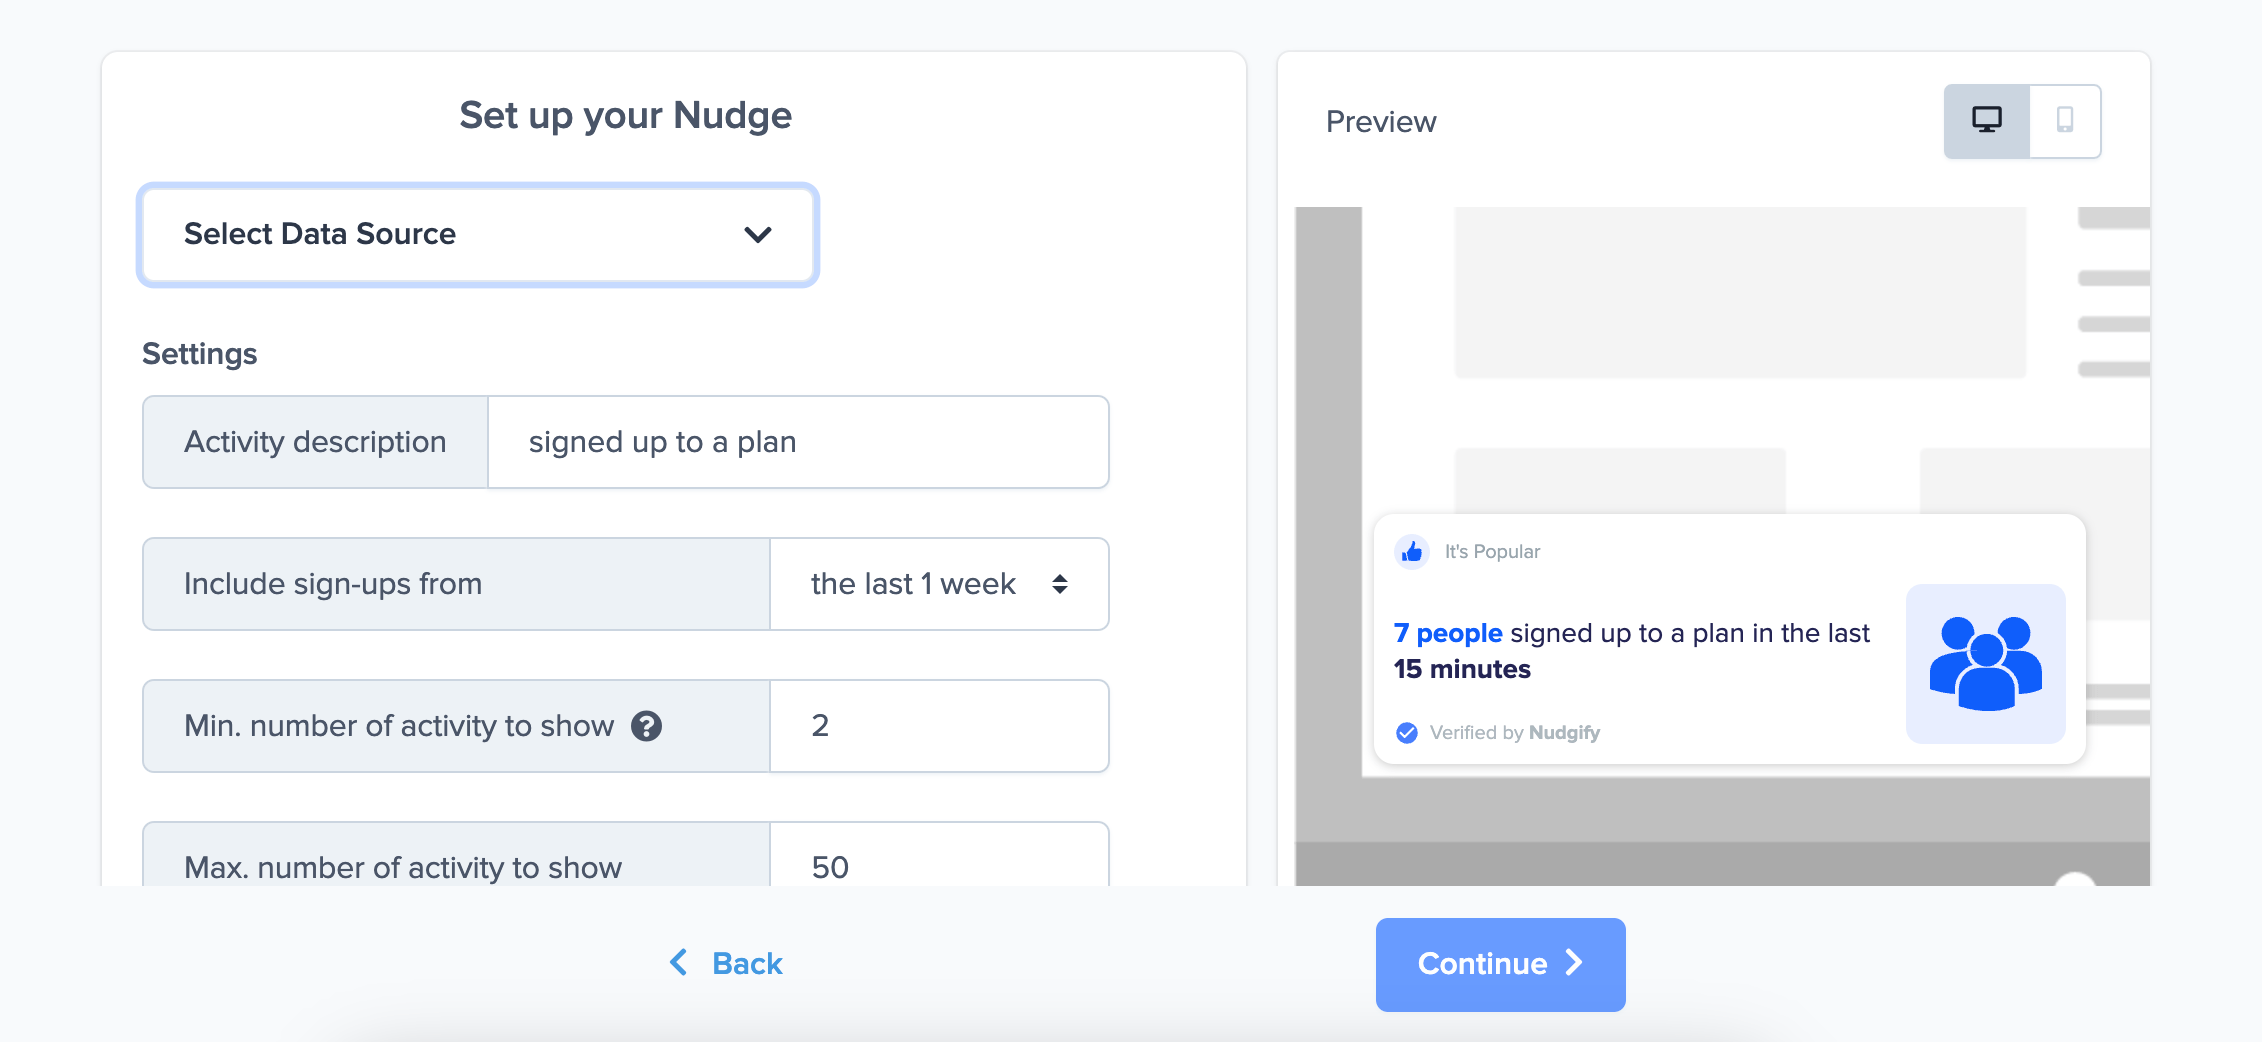
You can also customize the text of the Nudge here to whatever else you want to put down. You can also select how recent the Purchases need to be that you want to display, and set a minimum and maximum number of Purchases. Find more about the customization options for Purchase Nudges.
Click “Continue”. The Nudge will now automatically capture and show a summary of recent subscriptions. You can track how your Nudges perform from your Statistics page.
That’s it! 🙌
All your new Elopage Purchases will now be turned into powerful Social Proof automatically and display Nudges on your site.
