Turn your FastSpring Sign-Ups and Purchases into Social Proof
FastSpring is a comprehensive e-commerce platform designed to help software companies and digital content creators sell their products and services online. It provides a wide range of tools for managing subscriptions, processing payments, handling taxes, and delivering digital products, making it especially useful for businesses that operate globally.
You can easily connect FastSpring to Nudgify with our FastSpring integration to showcase Social Proof notifications on your website, in real-time.
Connect Purchases and/or Sign-ups
You can connect two types of FastSpring’s data to Nudgify: sales and sign-ups. You can use our FastSpring Sign-up Integration to connect new users that are added in your FastSpring account and show them in Sign-up Nudges. You can use our FastSpring Purchases Integration to connect your and our FastSpring sales, and show them in Purchase Nudges.
Connect FastSpring Sign-ups
The following data from FastSpring will be synced with Nudgify in order to build Nudges:
- Full Name
- City
- State
- Country
- Date
Follow the steps below to connect your FastSpring user data to Nudgify and show new Sign Ups in Sign-up Nudges.
Step 1. Copy Your Webhook URL
To manage your integrations, click the “Integrations” button on the left-hand sidebar. This will take you to the Integrations page, where you manage your integrations with other apps and software. Find FastSpring Sign-Ups in the list and click “Connect”.

Click to copy your Nudgify Webhook URL
Step 2. Create a Webhook in FastSpring and paste your Webhook URL
You will now paste your Nudgify Webhook URL in the right place in your FastSpring account so that new user data is sent automatically to your Nudgify account.
You can find here the FastSpring instructions for using Webhooks.
As a summary, follow these steps in your FastSpring dashboard:
- Go to Developer Tools > Webhooks
- Click on Add Webhook, enter a name for your webhook and save.
- Click on Add URL Endpoint.
- Copy the Nudgify Webhook URL from your Nudgify account.
- Paste your Nudgify Webhook URL in the URL field.
- Under Events, select account.created.
- Click on Save.
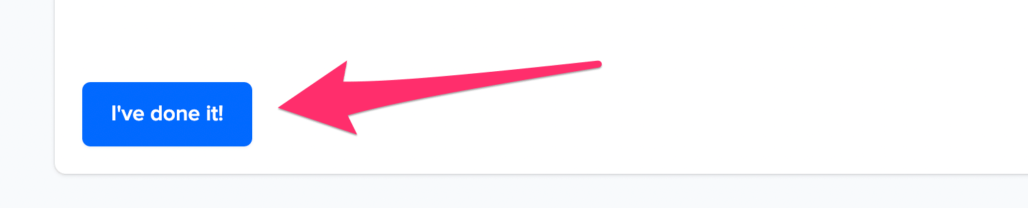
Go back to Nudgify and click the “I’ve done it” button.
Any new Sign-up will be added to your Sign-ups Data Feed. To turn these data into Social Proof Nudges on your site, create a Sign-up Nudge and select FastSpring as the data source.
Congratulations! You have now linked your new FastSpring sign-ups to Nudgify 🙌
Step 3. Create Sign-ups Nudges for new FastSpring Users
On your Data Feeds page, in the “sign-ups” tab, you will be able to see any new user sign ups that are sent to Nudgify. It’s time to start showcasing new FastSpring sign-ups in Social Proof Nudges!
You can create two types of Nudges with the FastSpring sign-ups integration.
- Recent Sign-Ups Nudges that show single sign-ups
- All Sign-Ups Nudges that show a count of multiple sign-ups
Show Recent Activity – Single Sign-ups
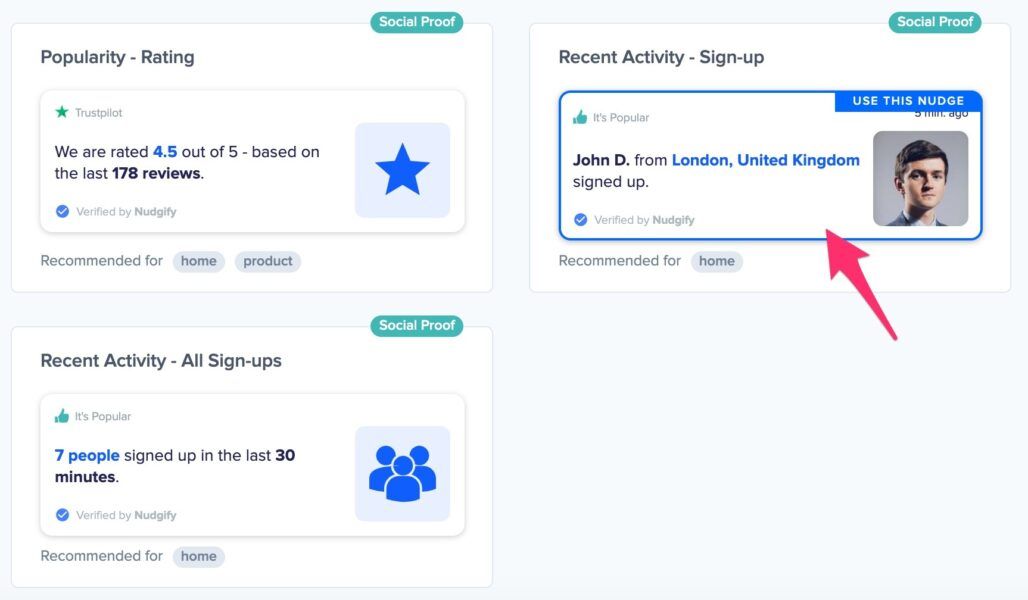
Go to the Nudges page and click “Add Nudge”. Choose the Nudge labeled “Recent Activity – Single Sign-up” from the Nudge Library.
You can now configure the selected Nudge. First of all, select “FastSpring Sign-Ups” as the data source. This way, the Nudge will use your FastSpring data to show in the Nudge:
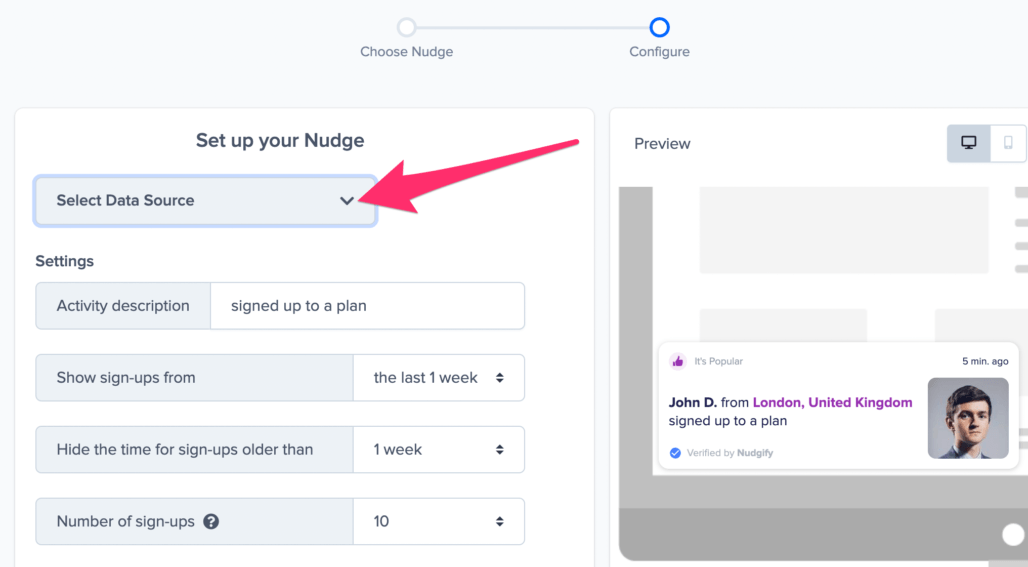
You can also customise the text of the Nudge here (“subscribed to our newsletter”, “signed-up to our mailing list”, or whatever you want to display). You can also select how recent the sign-ups need to be that you want to display. Find out more about the customisation options for Sign-up Nudges.
Once you’re done, click “Continue”. The Nudge will now automatically capture and show individual recent sign-ups. You can track how your Nudges perform from your Statistics page.
Show All Sign-ups
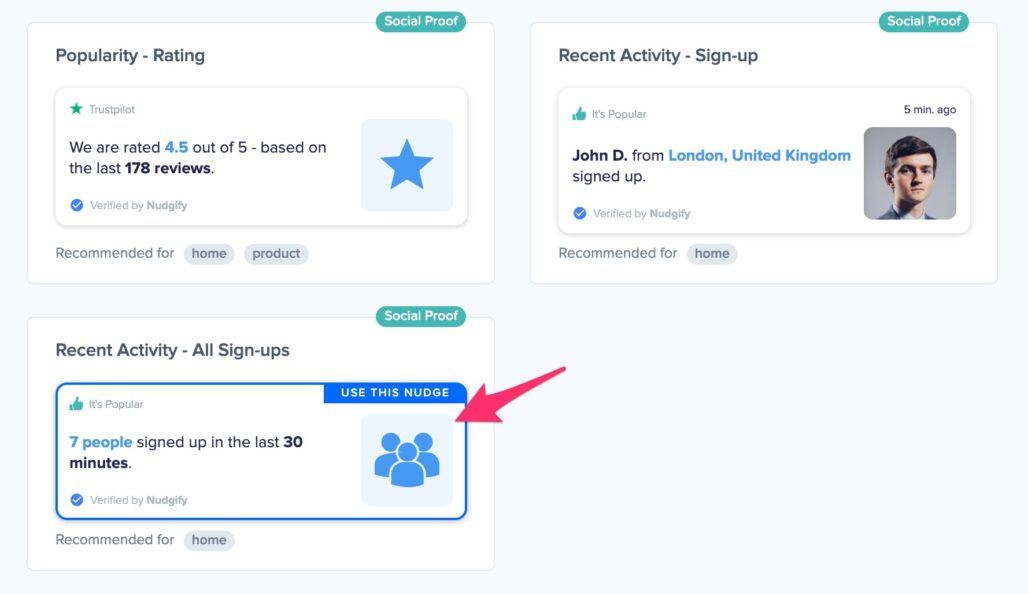
When creating a new Nudge, choose the “Recent Activity – All Sign-ups” Nudge in your Nudge Library:
You can now configure the selected Nudge. First of all, select “FastSpring Sign-Ups” as the data source. This way, the Nudge will use your FastSpring data to show in the Nudge:
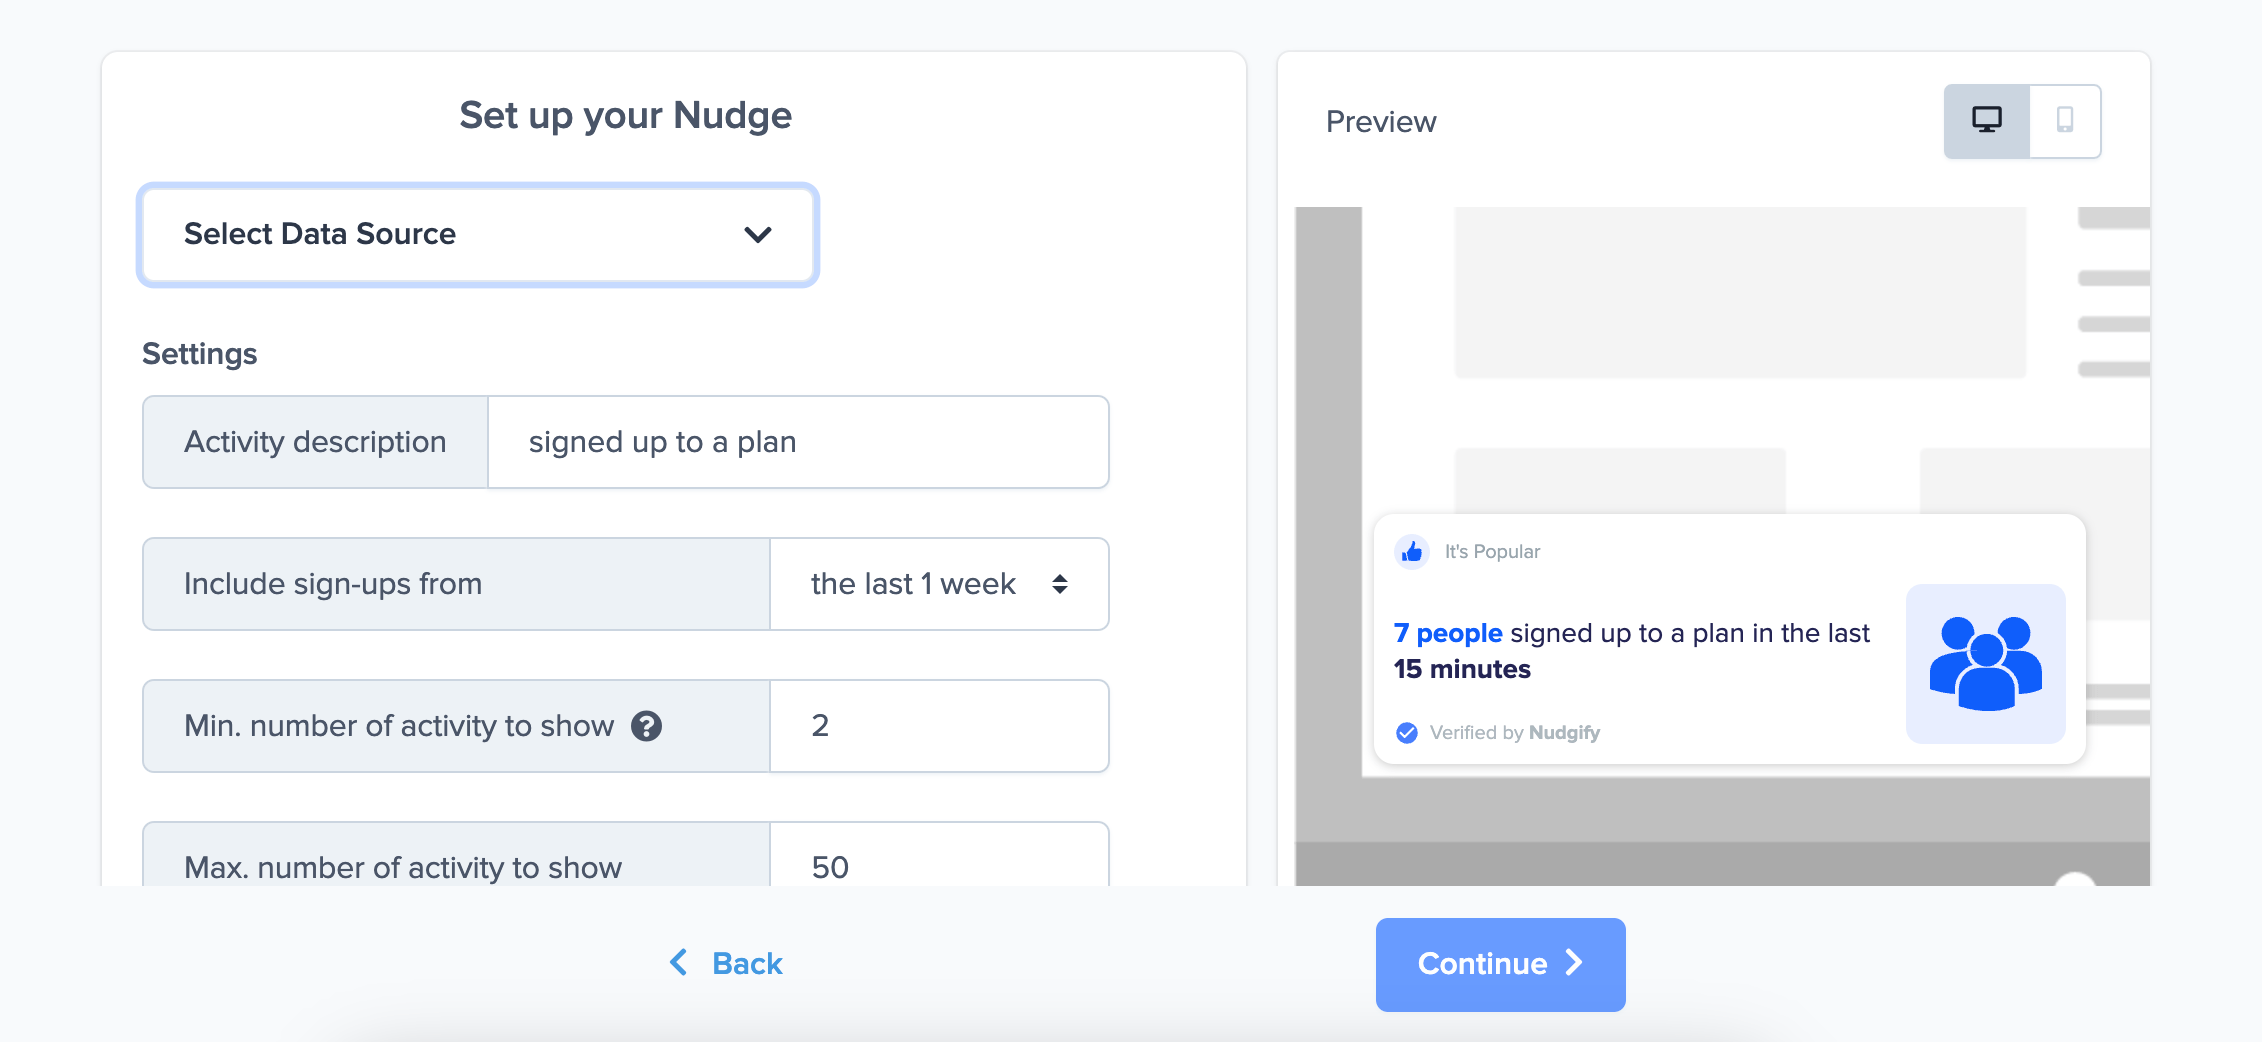
You can also customise the text of the Nudge here (“subscribed to our newsletter”, “signed-up to our mailing list”, or whatever else you want to put down). You can also select how recent the sign-ups need to be that you want to display, and set a minimum and maximum number of Sign-ups. Find more about the customization options for Sign-up Nudges.
Click “Continue”. The Nudge will now automatically capture and show a summary of recent subscriptions. You can track how your Nudges perform from your Statistics page.
That’s it! 🙌
All your new FastSpring Sign-Ups will now be turned into powerful Social Proof automatically and display Nudges on your site.
Connect FastSpring Purchases
The following data from FastSpring will be synced with Nudgify in order to build Nudges:
- Full Name
- Order ID
- Product Name
- Product ID
- Order Date
- IP Address
- Country
Follow the steps below to connect your FastSpring purchase data to Nudgify and show new registrations in Purchase Nudges.
Step 1. Copy Your Webhook URL
To manage your integrations, click the “Integrations” button on the left-hand sidebar. This will take you to the Integrations page, where you manage your integrations with other apps and software. Find FastSpring Purchases in the list and click “Connect”.

Click to copy your Nudgify Webhook URL
Step 2. Create a Webhook in FastSpring and paste your Webhook URL
You will now paste your Nudgify Webhook URL in the right place in your FastSpring account so that new user data is sent automatically to your Nudgify account.
You can find here the FastSpring instructions for using Webhooks.
As a summary, follow these steps in your FastSpring dashboard:
- Go to Developer Tools > Webhooks
- Click on Add Webhook, enter a name for your webhook and save.
- Click on Add URL Endpoint.
- Copy the Nudgify Webhook URL from your Nudgify account.
- Paste your Nudgify Webhook URL in the URL field.
- Under Events, select order.completed.
- Click on Save.
Go back to Nudgify and click the “I’ve done it” button.
Any new Purchase will be added to your Purchases Data Feed. To turn these data into Social Proof Nudges on your site, create a Purchase Nudge and select FastSpring as the data source.
Congratulations! You have now linked your new FastSpring Purchases to Nudgify 🙌
Step 3. Create Purchases Nudges for new FastSpring Orders
On your Data Feeds page, in the “Purchases” tab, you will be able to see any new purchases that are sent to Nudgify. It’s time to start showcasing new FastSpring Purchases in Social Proof Nudges!
You can create two types of Nudges with the FastSpring Purchases integration.
- Nudges that show single purchases
- Nudges that show a count of multiple purchases
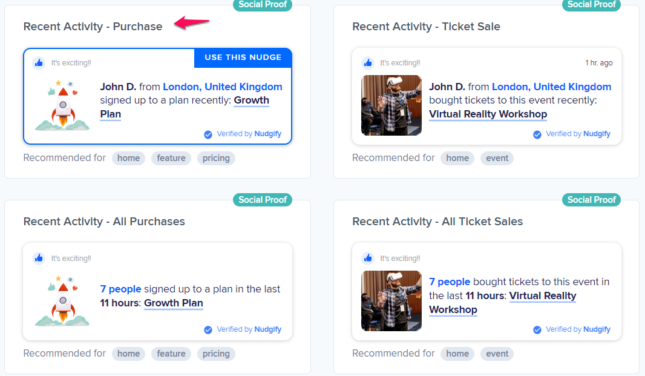
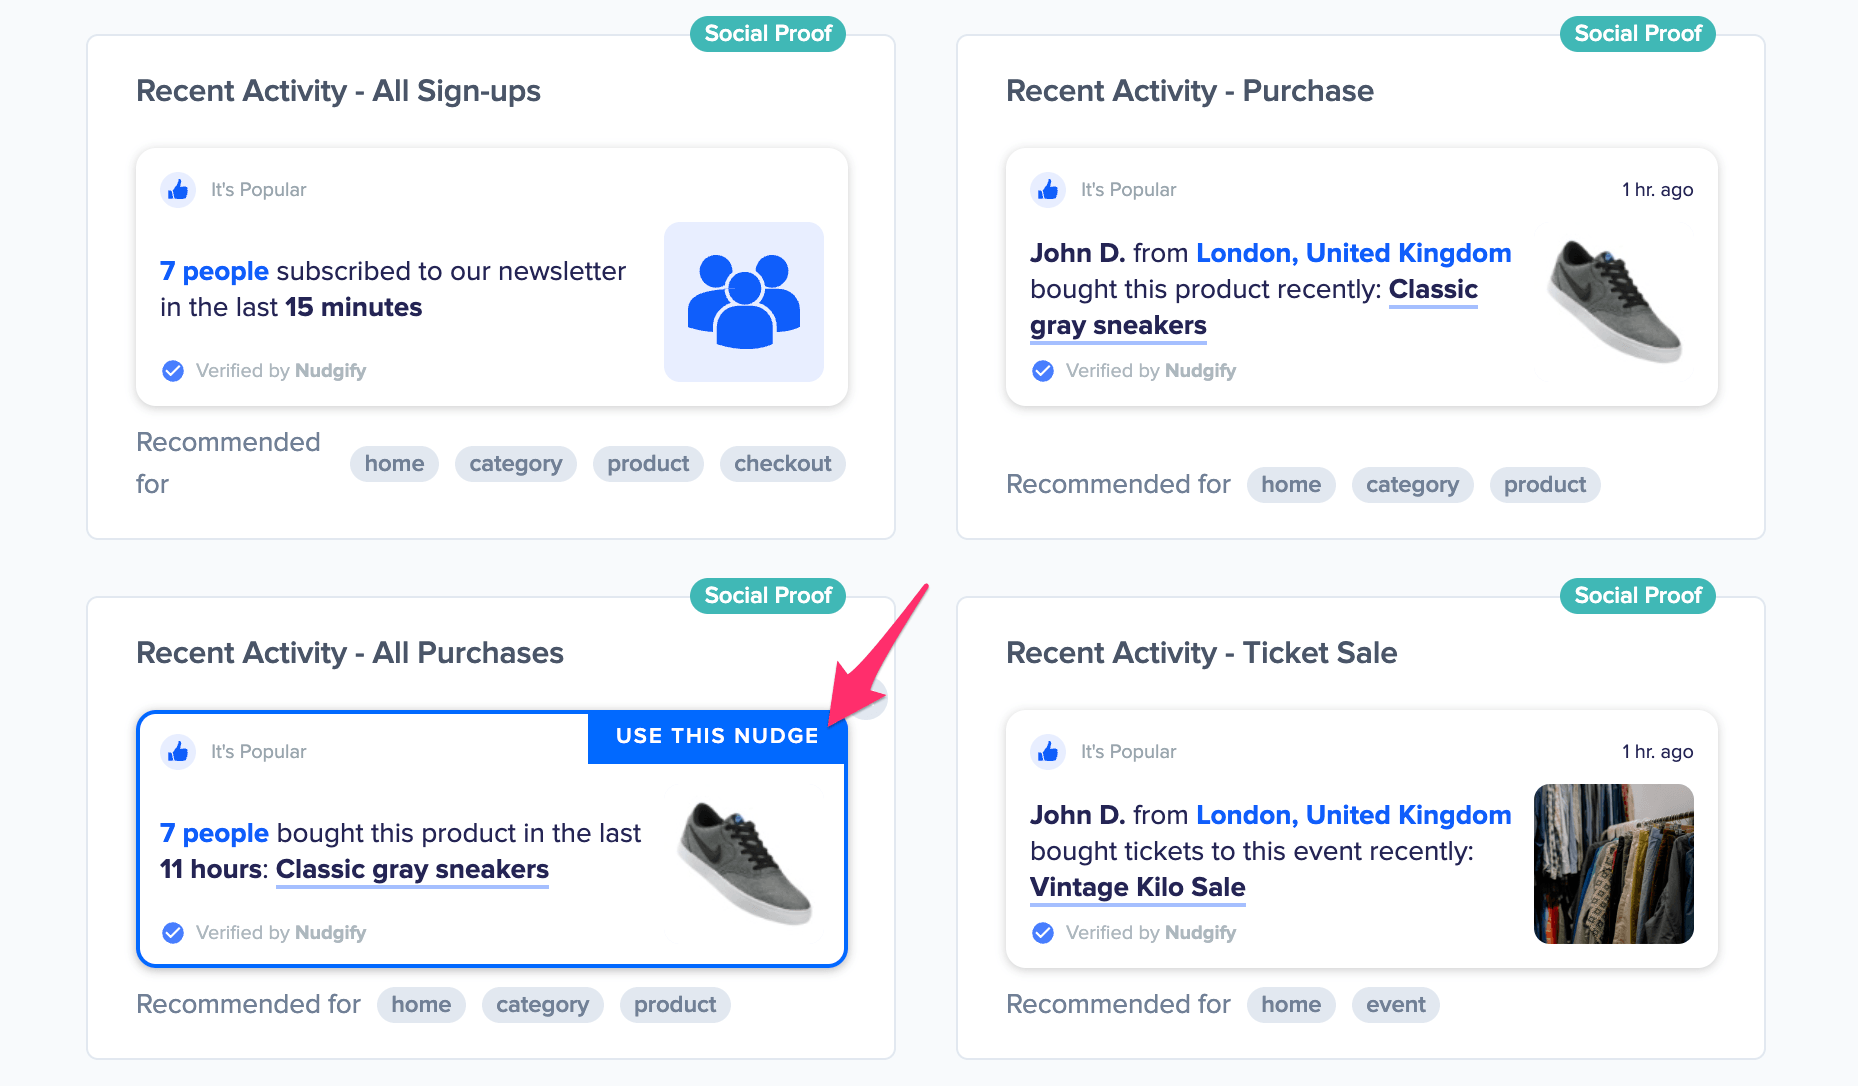
Show Single Purchases
Go to the Nudges page and click “Add Nudge”. Choose the Purchase Nudge from the Nudge Library.
You can now configure the selected Nudge. First of all, select “FastSpring Purchases” as the data source. This way, the Nudge will use your FastSpring data to show in the Nudge:
You can also customise the text of the Nudge here (“ordered an item”, “purchased an item”, or whatever you want to display). You can also select how recent the Purchases need to be that you want to display. Find out more about the customisation options for Purchase Nudges.
Once you’re done, click “Continue”. The Nudge will now automatically capture and show individual recent Purchases. You can track how your Nudges perform from your Statistics page.
Show All Purchases
When creating a new Nudge, choose the “Recent Activity – All Purchases” Nudge in your Nudge Library:
You can now configure the selected Nudge. First of all, select “FastSpring Purchases” as the data source. This way, the Nudge will use your FastSpring data to show in the Nudge:
You can also customize the text of the Nudge here to whatever else you want to put down. You can also select how recent the Purchases need to be that you want to display, and set a minimum and maximum number of Purchases. Find more about the customization options for Purchase Nudges.
Click “Continue”. The Nudge will now automatically capture and show a summary of recent subscriptions. You can track how your Nudges perform from your Statistics page.
That’s it! 🙌
All your new FastSpring Purchases will now be turned into powerful Social Proof automatically and display Nudges on your site.